Can Hydrangeas be grown hydroponically? Yes, you can grow Hydrangea hydroponically. Growing Hydrangea indoor and hydroponically is a fun for growers. Hydrangea prefers 65-70°F (18-21°C).
Humidity is key too – aim for about 60%. When you have to transplant your Hydroponic Hydrangea, the optimum time to transplant Hydroponic Hydrangea is when the temperatures are not extreme.
Hydrangea is commonly known as Hortensia and belongs to the Hydrangeaceae family. It forms flowers of different colors and these flowers are in clusters that look very appealing.
The colors of Hydrangea depend on the pH of the soil. The size of Hydrangea macroflora (Bigleaf Hydrangea) or Endless Summer, can grow up to 8 feet tall and 4 feet wide.
Can Hydrangeas Grow Indoors?
You can grow Hydrangeas indoors both in pots and in hydroponics. Your Hydrangeas can adapt remarkably well to indoor environments.
To ensure their proper growth growth, pick a bright spot near a sunny window, this allow them to bask in ample sunlight. Go for well-draining soil and maintain consistent moisture levels, as indoor settings may vary in humidity.
With these indoor-specific adjustments, you’ll witness your hydrangeas flourishing beautifully within the comfort of your home!”
Hydroponically Grown Meaning:
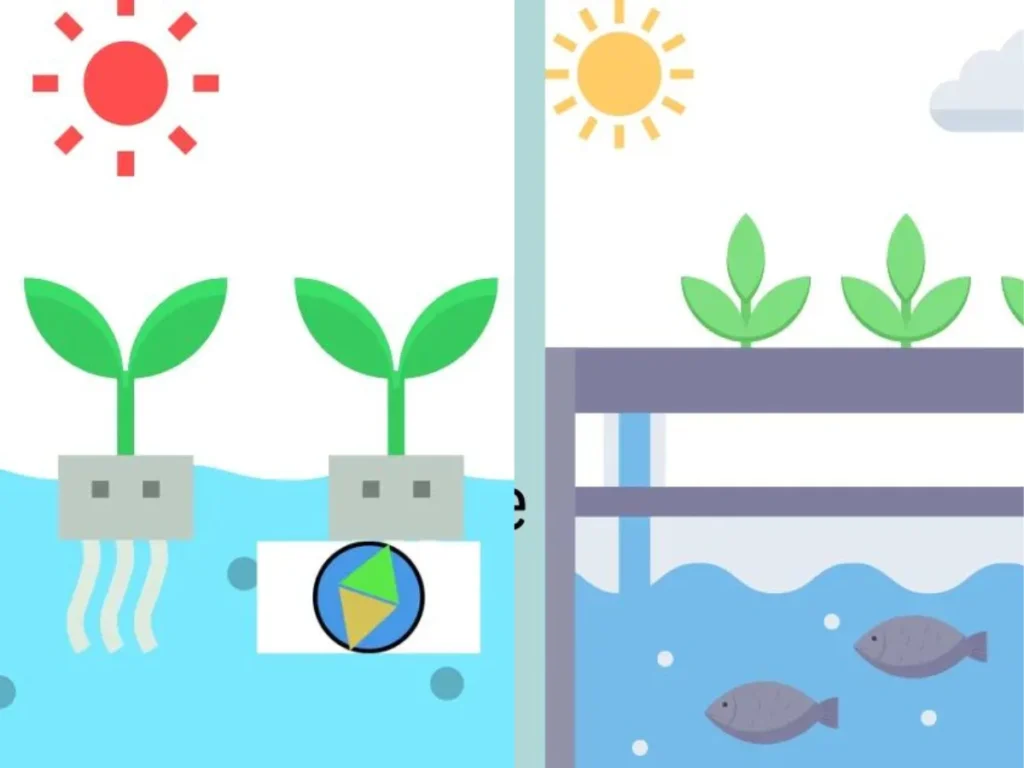
Traditionally plants grow in soil where the plants receive water and minerals from the soil. In this situation, the roots of the plants interact with the natural biome present in the soil.
Word Hydroponic is derived from the Greek words, Hydro meaning water and Ponos meaning labor or work. So, if you combine the two meanings, it means water works.
So, hydroponics is a technique of growing plants in a soil less environment. The general concept is that the plants grow in water. Yes, it is true for most of the time, but it includes soil less environment. For example if you grow microgreens in water, so it will be called as hydroponic microgreens or hydroponically grown microgreens.
Endless Summer: How to Root Hydrangea by Hydroponics?
You can root Hydrangea into a hydroponic environment. Follow these steps:
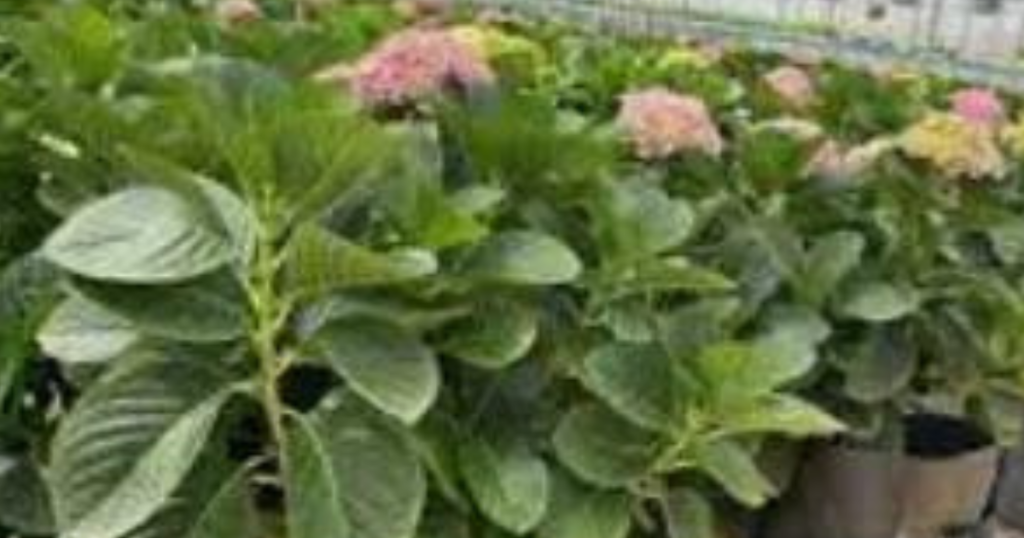
Best Hydroponic Hydrangea:
Hydrangea, commonly known as Hortensia, boasts varieties that are particularly well-suited for hydroponic cultivation. This suitability stems from their robust root system and manageable size. Additionally, their ability to bloom in varied pH levels further enhances their versatility as a choice for hydroponic gardening.
The Endless Summer is Hydrangea macrophylla and is blue in color and is particularly suited for hydroponic cultivation. It is blue, pink, purple and white colors. It is toxic to humans, animals.
How to Propagate Hydrangeas?
Propagation of hydrangeas hydroponically begins with stem cuttings. Select a healthy stem, cut a 4-6 inch segment, and remove the lower leaves. Dip the cutting in rooting hormone and place it in a hydroponic propagation system. A simple deep water culture setup with a rooting medium like Rockwool works well. Maintain a temperature of around 70°F and high humidity for optimal rooting.
Hydroponic Equipment for Indoor Hydrangea
Following equipment are helpful in growing Hydrangea indoors:
Hydroponic System for Hydrangea Indoor:
For hydrangeas, a Deep Water Culture (DWC) system is ideal. It immerses the plant roots in a nutrient-rich solution, providing continuous access to water, nutrients, and oxygen. This system is straightforward to set up and manage, making it suitable for beginners.
How to Use Grow Light for Hydrangea?
Using a LED grow light effectively for hydrangeas involves several key considerations to ensure the plants receive the right amount of light and thrive. Here’s a step-by-step guide:
Choose the Right Grow Light:
Select a full-spectrum LED grow light, as it provides a balance of cool and warm light, mimicking natural sunlight. Full-spectrum lights are generally more efficient and better for plant growth.
Set Up the Light Correctly:
Place the grow light above the hydrangeas. The ideal distance between the light and the plants depends on the light’s intensity and the Hydrangea‘s growth stage. Usually, keeping the light 24-36 inches above the plant is a good starting point. Adjust as necessary based on how the plant responds.
Timing:
Hydrangeas need a balance of light and dark periods. Generally, providing 14-16 hours of light per day is suitable. Use a timer to regulate the light cycles, mimicking natural day and night patterns.
Remember, every plant and environment is different. It’s important to observe your hydrangeas and adjust the lighting and care as needed. Also, consider the specific requirements of the type of Hydrangea you are growing, as different varieties may have slightly different needs.
Air Pumps and Air Stones:
Though they are not required but you can use them to supplement agitation. Some growers think that these are essential for oxygenating the nutrient solution, ensuring that the Hydrangea roots receive ample oxygen, which is vital for their growth.
How to use air pumps and air stones for Hydrangea?
Using an air stone and air pump in a hydroponic system for growing hydrangeas involves a few key steps to ensure proper oxygenation of the nutrient solution. Here’s how to set it up and use it effectively:
Choose the Right Air Pump and Air stone:
Select an air pump suitable for the size of your hydroponic reservoir. The pump should be powerful enough to provide adequate oxygen for the entire solution. The air stone should also be appropriate for the size of the reservoir – larger reservoirs may require larger or multiple air stones.
Connect the Air Pump to the Air stone:
Use airline tubing to connect the air pump to the air stone. Cut the tubing to the needed length, ensuring it can comfortably reach from the pump to the air stone when placed in the reservoir.
Place the Air stone in the Reservoir:
Position the airs tone at the bottom of the reservoir. It’s important to place it in a way that allows for the most efficient diffusion of oxygen throughout the entire solution.
Secure the Air Pump:
Position the air pump above the water level of your reservoir to prevent water from back-siphoning into the pump in case of a power outage. Most air pumps are not waterproof, so they should be placed in a safe, dry area.
Turn On the Air Pump:
Once everything is connected and in place, plug in the air pump. You should see bubbles coming from the air stone, indicating that it is oxygenating the water.
Check and Adjust the Bubbling:
Observe the bubbling pattern in the reservoir. You want to see a consistent stream of bubbles, which indicates that oxygen is being evenly distributed throughout the nutrient solution.
Regular Maintenance:
Clean the air stone periodically to prevent blockages, as mineral deposits from the nutrient solution can accumulate over time. Also, monitor the performance of the air pump and replace or repair it if it shows signs of decreased efficiency.
Monitor Plant Health:
Pay attention to the health of your hydrangeas. Signs of sufficient oxygenation include healthy root growth and vibrant foliage. If the plants show signs of distress, you may need to adjust your oxygenation setup.
Adjust As Needed:
Depending on your specific setup and the growth stage of your hydrangeas, you may need to adjust the strength of the air pump or the positioning of the air stone.
Using an air stone and air pump in your hydroponic system will ensure that your hydrangeas have the necessary oxygen for healthy root and plant development. This setup is particularly important in systems like Deep Water Culture, where roots are constantly submerged in the nutrient solution.
pH and EC Meters:
Regular monitoring of the pH and electrical conductivity of the nutrient solution is critical. Hydrangeas require a specific pH range to thrive and absorb nutrients effectively.
How to use EC meter for Hydroponic Hydrangea?
Using an Electrical Conductivity (EC) meter in hydroponics is crucial for managing the nutrient levels in the solution, which directly affects plant health and growth. Here’s how to use an EC meter effectively for your hydroponic hydrangeas:
1. Understand EC Readings: EC measures the electrical conductivity of the nutrient solution, which correlates to the amount of dissolved salts (nutrients) in the water. A higher EC value indicates a higher concentration of nutrients.
2. Calibrate the EC Meter: Before using your EC meter, it’s important to calibrate it according to the manufacturer’s instructions. This usually involves using a calibration solution with a known EC value.
3. Prepare Your Nutrient Solution: Mix your nutrient solution according to the instructions for hydrangeas. Different growth stages may require different nutrient concentrations.
4. Take an Initial Reading: After mixing your nutrient solution, use the EC meter to take an initial reading. Dip the meter’s probe into the solution, ensuring it’s fully submerged, and wait for the reading to stabilize.
5. Compare with Ideal EC Range: Hydrangeas have specific nutrient needs, and therefore an ideal EC range. Research the recommended EC range for hydrangeas, which might vary depending on their growth stage. As a general guide, most hydroponic plants thrive in an EC range of 1.2 to 2.0 mS/cm (milli Siemens per centimeter), but this can vary.
6. Adjust the Nutrient Solution if Necessary: If the EC reading is too high, it means the nutrient concentration is too strong. You can dilute the solution with more water. If the reading is too low, add more nutrients to increase the concentration.
7. Regular Monitoring: Regularly check the EC of your nutrient solution. The frequency of checking should increase as the plants grow, as larger plants consume more nutrients.
8. Consider Other Factors: EC levels can be affected by water temperature, so try to take readings at a consistent temperature. Also, as plants absorb nutrients, the EC of the solution will change, so regular adjustments are necessary.
9. Flush System Periodically: Over time, salt can build up in the system, potentially harming the plants. Periodically flushing the system with clean water can help prevent this buildup.
10. Record Keeping: Keep records of your EC readings and adjustments. This will help you understand the nutrient needs of your hydrangeas and improve your management over time.
Using an EC meter helps you maintain the right nutrient balance in your hydroponic system, promoting healthy growth and flowering of your hydrangeas. Remember, each variety of hydrangea might have slightly different nutrient requirements, so it’s always beneficial to do specific research on the variety you are growing.
Timers:
Automating the lighting and feeding schedules with timers helps.
Hydroponic Hydrangea Care
Best pH Level for Hydroponic Hydrangea
The pH level of the nutrient solution is critical for hydrangeas. They thrive in a slightly acidic environment, with an ideal pH range of 5.5 to 6.5. This range allows optimal nutrient uptake and can even influence bloom color – more acidic solutions can lead to blue flowers, while alkaline conditions may produce pink blooms. Regular testing and adjustment of the pH level are essential for maintaining plant health.
Lighting Requirements for Hydroponic Hydrangea indoors
Hydrangeas require substantial light to flourish, especially when grown indoors. An ideal light setup should provide 14-16 hours of light per day, mimicking natural sunlight. LED grow lights are recommended due to their efficiency and full spectrum. The light intensity should be around 600 μmol/m²/s to encourage robust growth and abundant flowering.
Temperature Control for Hydroponic Hydrangea
Temperature plays a vital role in hydroponic gardening. Hydrangeas prefer a daytime temperature of 65-75°F (18-24°C) and a slightly cooler night temperature of 55-65°F (13-18°C). These conditions help promote healthy growth and vibrant blooms. Consistent temperature maintenance is key to avoiding stress on the plants.
Electrical Conductivity (EC) for Hydroponic Hydrangea
EC measures the concentration of nutrients in the hydroponic solution. For hydrangeas, an EC level between 1.5 and 2.5 mS/cm is ideal. This range ensures that the plants receive an adequate but not excessive amount of nutrients. Regular monitoring and adjustments help maintain this balance.
Nutrients Requirement for Hydroponic Hydrangea
In a hydroponic system, nutrients are delivered directly to the plant’s roots through a water-based solution. The essential nutrients must be balanced and readily available.
Primary Nutrients:
Nitrogen (N), Phosphorus (P), and Potassium (K). A balanced NPK ratio, like 10-10-10, is often recommended.
Secondary Nutrients:
Calcium (Ca), Magnesium (Mg), and Sulfur (S). These are required in smaller quantities but are still essential.
Micronutrients:
Elements like Iron (Fe), Manganese (Mn), Zinc (Zn), Copper (Cu), Boron (B), Molybdenum (Mo), and Chlorine (Cl) should be present in trace amounts.
Mycorrhizae Enhancing Nutrient Uptake:
Hydrangea can benefit from mycorrhiza in many ways. Though, hydroponic systems are soilless, while mycorrhizal associations are usually soil-based phenomenon.
Mycorrhizae are symbiotic fungi that form a mutually beneficial relationship with roots of host plants, aiding in nutrient uptake and overall plant health. Here’s how mycorrhizae can benefit hydroponic Hydrangea:
Enhanced Nutrient Uptake:
Mycorrhizal fungi grow in soil and develop hyphae and these hyphae penetrate the roots and thus provides extra channel for nutrients absorption.
Improved Water Management:
Hydrangea also use hyphae of Mycorrhizal fungi to absorb water. They form a network of mycelium (fungal threads) that helps Hydrangea roots to explore a larger volume of the nutrient solution.
This can improve the plant’s ability to access water, especially in hydroponic systems where water and nutrient availability must be carefully controlled.
Disease Resistance:
Mycorrhizal associations can contribute to the plant’s defense against specific soil-borne pathogens and diseases. While hydroponic systems typically have lower disease incurrence, as compared to soil-based cultivation, mycorrhizae can still protect against potential pathogens.
Enhanced Stress Tolerance:
Mycorrhizal fungi can help hydroponic Hydrangea plants become more resilient to environmental stressors like drought, temperature fluctuations, and nutrient imbalances. They can support the plant’s overall health and ability to withstand adverse conditions.
How to Inoculate Hydrangea with Mycorrhiza?
To introduce mycorrhizae to your hydroponic hydrangea system, you can:
i. Inoculate the Root Zone: You can use commercially produced inoculant for this purpose. Generally, in the market plant-specific inoculum of mycorrhiza is available in the market. Introduce the mycorrhizal fungi into the root zone of your Hydrangea plants.
ii. Maintain Optimal Conditions: Ensure your hydroponic system provides suitable environmental conditions, such as proper pH levels, temperature, and oxygenation, to support mycorrhizal growth and activity.
iii. Monitor Growth of Hydrangea Plant and Adjust Conditions: Regularly monitor the health and growth of your hydrangea plants and adjust the mycorrhizal application as needed based on their response.
While, mycorrhizae can benefit hydroponic plants, choosing the correct species of mycorrhizal fungi is essential in ensuring compatibility with the specific hydroponic setup and plant species you are cultivating.
Table: Optimum Values for Hydrangea in Hydroponics
| Parameter | Optimal Value | Acceptable Range |
| pH | 5.5 | 6.5 |
| Nutrient Solution (EC) | 1.5-2.0 mS/cm | 1.0-2.5 mS/cm |
| Temperature | 64.4-71.6°F (18 – 22°C) | 59-77°F (15-25°C) |
| Light Exposure | 16-14 hours/day | 12-18 hours/day |
| Water Quality | Soft (Low in minerals) | Avoid Chlorinated or Hardwater |
| Oxygenation | High | Essential for Root Growth |
Troubleshooting Hydroponic Hydrangeas
Common problems in hydroponic Hydrangea cultivation can include nutrient deficiencies, pest infestations, and issues like yellowing leaves. Understanding these problems and their solutions is crucial for maintaining a healthy hydroponic garden.
1. Nutrient Deficiency Hydroponic Hydrangeas Symptoms
Nutrient deficiencies occur when hydrangeas don’t receive the essential macro or micro nutrients in the required amounts. This can happen due to imbalanced nutrient solutions or incorrect pH levels that hinder nutrient uptake.
Signs:
- Nitrogen deficiency often shows as yellowing of older leaves.
- Phosphorus deficiency can lead to dark green or purplish leaves.
- Potassium deficiency is indicated by yellowing leaf edges and brown spots.
Solution:
- Regularly check and adjust the nutrient solution’s composition and pH levels.
- Use a well-balanced hydroponic nutrient formula tailored for flowering plants.
- Monitor EC levels to ensure adequate nutrient concentrations.
2. Pest Infestations in Hydroponic Hydrangeas
Pests can be a challenge in hydroponic systems, with common culprits including aphids, spider mites, and whiteflies. These pests can stress the plants, leading to poor growth and bloom development.
Signs:
- Presence of small insects on leaves or stems.
- Sticky residue or sooty mold indicates aphid infestation.
- Fine webs under leaves suggest spider mites.
Solution:
- Implement integrated pest management (IPM) strategies.
- Use organic pesticides like neem oil or insecticidal soaps.
- Regularly inspect plants and remove pests manually if possible.
- Ensure good air circulation to deter pest infestations.
3. Yellowing Leaves in Hydroponic Hydrangeas
Yellowing leaves in hydroponic hydrangeas can be due to several factors, including nutrient imbalances, inadequate lighting, or water quality issues.
Signs:
- Yellowing of leaves, starting either from the tips, edges, or between the veins.
- Overall reduction in plant vigor and bloom production.
Solution:
- Check and adjust the lighting setup to provide sufficient light.
- Regularly test and adjust the pH and EC levels of the nutrient solution.
- Ensure the water used in the system is of good quality, preferably filtered to remove any impurities.
- Monitor the temperature and humidity levels to ensure they are within the optimal range for hydrangeas.
Harvesting Indoor Hydroponic Hydrangeas for Beginners
When it comes to harvesting indoor hydroponic hydrangeas, timing is crucial for ensuring the best quality and longevity of the blooms. Here’s a guideline on when and how to harvest these beautiful flowers:
i. Optimum Harvesting Time of Hydrangea
Following are the optimal harvesting time of Hydrangea:
Maturity of Blooms
The best time to harvest hydrangeas is when the flowers are fully matured. This is typically indicated by rich, vibrant coloration and fully opened blooms.
Early Morning Harvest:
Ideally, hydrangeas should be harvested in the early morning. This is when the plants are most hydrated and the blooms are at their freshest, leading to longer-lasting cut flowers.
Seasonal Considerations:
While indoor hydroponic systems allow for year-round growth, the natural blooming cycle of hydrangeas typically peaks in late spring and summer. Keep an eye on the bloom cycles to plan your harvest accordingly.
2. Signs of Readiness
Firmness of Petals: The petals of the hydrangea should feel firm to the touch, indicating that they are not too young (soft) or too old (brittle).
Color Development: Look for fully developed color. In many hydrangea varieties, this means a deep, saturated hue. However, some varieties may have different color indicators.
Stem Strength: The stems should be sturdy and strong enough to support the weight of the blooms. This indicates that they are ready to be cut and will hold up well in arrangements.
3. Harvesting Technique
Clean and Sharp Cut: Use a sharp, clean pair of pruning shears or scissors. Make a diagonal cut on the stem to increase the surface area for water absorption.
Length of Stem: Cut the stem to the desired length, depending on how you plan to use or display the blooms. Leave enough stem for the flower to be placed in water immediately after cutting.
Immediate Watering: Place the cut hydrangeas in a container of water as soon as possible. This quick transfer helps to prolong their freshness.
4. Post-Harvest Care
Hydration: Keep the harvested hydrangeas in water to maintain their freshness. Change the water regularly and trim the stems every few days to ensure continued water absorption.
Cool Environment: Store the cut hydrangeas in a cool environment away from direct sunlight and heat sources. This will help in preserving their vibrancy and extending their lifespan.
Harvesting indoor hydroponic hydrangeas at the right time and with the proper technique is essential for maximizing their beauty and longevity, whether used in floral arrangements or as standalone displays. Regular observation and a little bit of practice will help you identify the perfect harvesting moment for your hydrangeas.
vi. Benefits of Hydroponic Gardening over Soil Gardening
Hydroponic gardening offers several advantages over traditional soil-based gardening. It’s more water-efficient, allows for better nutrient management, and can lead to faster plant growth. However, it’s not without its challenges. Issues like pest control and nutrient imbalances can arise, requiring vigilance and knowledge to address.
When to Plant Hydrangeas?
Transplanting to a Container
The ideal stage for transplanting hydrangeas from hydroponics to potting mix is when they have developed a robust root system, typically 4-6 weeks after propagation. But you can also transplant hydroponic Hydrangea when it’s two weeks old. At this stage you can conveniently remove the Hydrangea from the hydroponic system.
Best Potting Mix Composition for Hydrangeas
A well-draining, nutrient-rich potting mix is key. A recommended composition per kg includes: 40% peat moss, 30% perlite, 20% vermiculite, and 10% compost. This mix ensures adequate moisture retention and air circulation.
How long should Hydrangea be kept in a Container?
Hydrangeas should ideally be kept in the container for 1-2 years, allowing them to establish a strong root system and foliage before transplanting.
How Avoiding Transplant Shock in Hydroponic Hydrangeas?
Transplanting a hydroponic Hydrangea to a container with potting mix can be challenging, as the transition from water-based to soil-based growing conditions can cause transplant shock. However, with proper care and precautions, you can minimize this stress. Here are the steps and precautions to take:
1. Gradual Acclimatization
- Adaptation Period: Before transplanting, gradually acclimatize the Hydrangea to its new environment. This can be done by placing the plant in the potting mix container for a few hours each day, gradually increasing the time over a week.
- Environment Matching: Try to match the temperature and light conditions of the new environment to those of the hydroponic system to reduce stress.
2. Preparing the Potting Mix
- Suitable Potting Mix: Use a high-quality potting mix that drains well yet retains sufficient moisture.
- Pre-Moistening: Moisten the potting mix before transplanting. This helps prevent the roots from drying out during the transition.
3. Careful Root Handling
- Gentle Extraction: Remove the hydrangea from the hydroponic system gently to avoid damaging the roots.
- Root Inspection: Trim any damaged or excessively long roots with a clean, sharp pair of scissors or pruning shears.
- Root Washing: If the hydroponic system used a growing medium, carefully wash away this medium from the roots, being cautious not to damage them.
4. Transplanting Process
- Planting Depth: Plant the hydrangea at the same depth it was growing in the hydroponic system.
- Gentle Planting: Place the plant in the center of the pot and fill around it with potting mix. Gently firm the mix around the base of the plant to eliminate air pockets.
5. Post-Transplant Care
- Immediate Watering: Water the plant thoroughly after transplanting to settle the soil around the roots and provide necessary hydration.
- Shade and Protect: Keep the transplanted hydrangea in a shaded, protected location for a few days to a week. This reduces the stress caused by intense light and temperature fluctuations.
- Monitor Moisture Levels: Ensure the potting mix remains consistently moist, but not waterlogged, during the first few weeks after transplanting.
- Gradual Sunlight Exposure: Gradually introduce the plant to more sunlight over several days or weeks, depending on the plant’s response.
6. Avoiding Fertilization Stress Delayed Fertilization: Avoid fertilizing the plant immediately after transplanting, as this can add additional stress. Wait until the plant shows signs of new growth, which indicates it has started to adapt to its new environment.
viii. Transplanting Hydroponic Hydrangea to Soil
Timing for Soil Transfer
The best time to transfer hydrangeas to soil is in the spring or early fall, avoiding extreme temperatures and giving the plant time to establish before either the growing or dormant season.
Soil Preparation and Weather Conditions
Prepare the soil by ensuring it is well-draining, rich in organic matter, and has a pH close to that of the hydroponic solution. Transplant on a cloudy day or in the evening to reduce stress. Remember to take proper care of your Hydrangea.
Do Hydrangeas Like Acidic or Alkaline Soil?
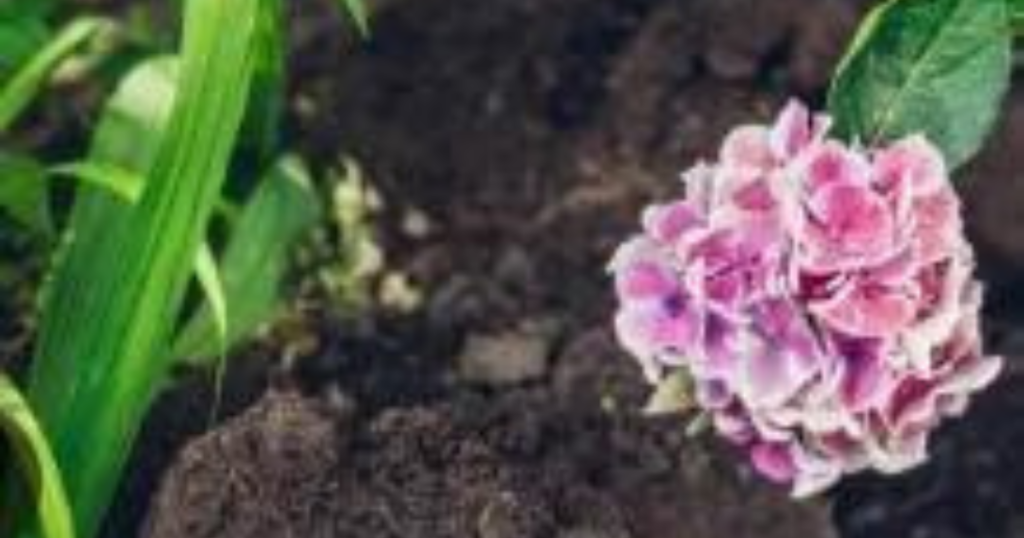
Hydrangeas generally prefer slightly acidic to neutral soil, with a pH range typically between 5.5 and 6.5. This pH level allows hydrangeas to effectively absorb nutrients from the soil, which is crucial for their growth and health.
The soil pH can also influence the color of some Hydrangea varieties. For instance, in many varieties of bigleaf hydrangeas (Hydrangea macrophylla), the flower color can change based on the pH of the soil:
- Acidic Soil (pH below 6): Tends to produce blue flowers. This is due to the availability of aluminum ions in acidic soils, which many bigleaf hydrangeas can absorb and use to produce blue pigments.
- Alkaline Soil (pH above 7): Often leads to pink or red flowers. In alkaline conditions, aluminum is less available to the plants, resulting in the absence of blue pigmentation.
It’s important to note that not all Hydrangea species are affected by soil pH in the same way. For example, white hydrangeas and other species like oakleaf (Hydrangea quercifolia) or panicle (Hydrangea paniculata) hydrangeas typically do not change color based on soil pH.
If you wish to alter the soil pH for color changes in susceptible varieties, you can add garden lime to raise the pH (making it more alkaline) for pinker flowers, or sulfur to lower the pH (making it more acidic) for bluer flowers. However, such adjustments should be done gradually and carefully, as rapid changes in soil pH can stress the plants. It’s always a good idea to use a soil pH tester to monitor the pH levels in your garden.
Best Weather to Transplant Hydrangea in Soil
Transplanting hydrangeas at the right time and under favorable weather conditions is crucial for their survival and health. The best time for transplanting depends on the plant’s growth stage and the climate of your area. Here’s a general guide:
1. Young or Newly Propagated Hydrangeas
- Ideal Time: Early spring or late fall, when the plant is dormant or just beginning to come out of dormancy. Avoid hot, dry periods.
- Weather Conditions: Overcast days with mild temperatures are ideal. This helps reduce transplant shock and water loss.
- Soil Conditions: Moist, well-drained soil. Water the soil well a day before transplanting.
2. Mature Hydrangeas
- Ideal Time: Late fall, after the leaves have fallen, or early spring before new growth starts. This timing helps the plant focus its energy on establishing new roots rather than maintaining foliage.
- Weather Conditions: Similar to young hydrangeas – overcast, cooler days are best. Avoid extreme temperatures.
- Soil Conditions: Ensure the new location has rich, well-draining soil. Water thoroughly after transplanting.
3. Hydrangeas in Bloom
Transplanting during blooming (late spring to early summer) is not recommended as it can stress the plant significantly. However, if necessary:
How to Care for a Hydrangea?
.Remember, the specific timing can vary based on your local climate and the specific type of hydrangea. Always monitor the weather forecast around the time you plan to transplant and avoid days with extreme temperatures or harsh conditions.
Hydrangea Transplant Shock
To minimize transplant shock in hydrangeas, transplant them during early spring or late fall on a cool, overcast day when the plant is dormant. Water the plant thoroughly a day before moving it. Prepare the new site with a hole twice as wide and just as deep as the root ball, improving the soil with organic matter if needed.
Carefully dig around the hydrangeas to preserve its root ball and quickly transfer it to the new location, ensuring it’s planted at the same depth as before. Immediately water the plant deeply, apply mulch around the base, and maintain consistent soil moisture without fertilizing right away. Light pruning of damaged or long branches can help the plant recover more effectively.
FAQs
Can hydrangeas be rooted in water?
Yes, hydrangeas can be rooted in water. Cut a healthy stem, remove the lower leaves, and place it in a jar of water. Change the water regularly until roots develop, then transplant it into soil.
How to root hydrangea by hydroponics in water?
To root a Hydrangea cutting hydroponically in water, take a healthy stem cutting, remove the lower leaves, and place it in a container with water. Ensure the nodes (where leaves attach) are submerged. Change the water every few days to prevent stagnation. Once roots develop, transplant the cutting into soil or a hydroponic medium.
How to grow hydrangeas in water?
To grow hydrangeas in water, start by rooting a stem cutting in a jar of water. Remove lower leaves, submerge the stem’s cut end, and place it in indirect light. Change the water regularly.
Once roots develop, continue growing it in water with added hydroponic nutrients, or transplant it into soil for optimal growth.
Is mycorrhizae good for hydrangeas?
Mychorrhizal fungi are good for Hydrangeas. These fungi form thin hyphae that enhance the nutrients and water uptake by the help Hydrangea to survive the transplant shock and also grow well. More absorption of nutrients will yield healthier Hydrangea.
What are grow lights?
Grow lights are artificial light sources used for indoor gardening. They provide the necessary light spectrum for plant growth, making them essential for plants in low-light conditions.
Hydrangea flower meaning?
The Hydrangea flower holds various meanings, making it popular in gardens and floral arrangements. Hydrangea symbolizes gratitude, heartfelt emotions, and abundance; hydrangeas convey appreciation and sincere feelings.
Additionally, they are associated with grace and beauty, adding a touch of elegance to any setting. With their lush petals and vibrant colors, hydrangeas also represent enduring love and heartfelt emotions, making them a cherished gift for special occasions like weddings and anniversaries.
Whether adorning a bouquet or gracing a garden, hydrangeas bring joy and sentimentality, embodying the essence of gratitude and admiration.
What time of year to take Hydrangea cuttings?
It’s late summers to take cuttings from the Hydrangea stem. The parameters are optimum during this time of the year.
Final Verdict
Can Hydrangeas be grown hydroponically? Yes, it’s entirely possible to root Hydrangea in water. The ideal type for this method is the Endless Summer variety, also known as Hydrangea macrophylla.
Begin by placing a cutting of this plant in a Deep Water Culture Hydroponic System. It’s important to have a good grasp of how to effectively utilize the hydroponic system and its associated tools.
Ensure proper management of nutrients, pH levels, and lighting for optimal growth. Once the plant is sufficiently developed, you can transition it into a container and eventually into soil, taking careful measures to reduce any transplant shock.
This approach offers a unique and efficient way to cultivate hydrangeas. Best time to transplant your Hydroponic Hydrangeas is when the temperature is not extreme. For USA, the spring or Fall is best, for Canada late spring and for Australia early autumn is the best time to transplant Hydrangeas into a pot or to soil.
Happy Gardening, See you!